This product’s journey from last year’s mediocre performance to today’s standout capability demonstrates real progress in laminate shower wall panels. Having spent time installing and testing several options, I can confidently say that durability and ease of installation make all the difference. I’ve handled panels that crack easily or don’t seal well, but the 133-WT-SUB-KIT Subway Wall Panel Kit, Gloss White, 96 sq ft impressed me with its non-porous PVC surface and simple, DIY-friendly setup. It’s a game-changer for anyone who wants a sleek, grout-free look without the hassle of ongoing maintenance.
What truly makes this kit shine is its seamless, watertight system that withstands moisture and wipes clean effortlessly. Its adjustable, fold-in side panels ensure a perfect fit, even over existing surfaces — cutting down installation time and mess. Compared to the others, it offers a more versatile fit, a professional tile look, and a more budget-friendly DIY approach while maintaining high quality. If you’re after a durable, easy-to-install solution that looks like real tile, I highly recommend giving this one a closer look.
Top Recommendation: **133-WT-SUB-KIT Subway Wall Panel Kit, Gloss White, 96 sq ft**
Why We Recommend It: This kit’s combination of non-porous, impact-resistant PVC, adjustable folding edges for custom fit, and comprehensive three-piece design makes it stand out. It mimics professional tile look, is grout-free, and easy to cut with common tools, making installation straightforward for DIYers. Its watertight and low-maintenance surface outperforms alternatives like the marble look panels or stone finishes, which are often more expensive or less adaptable. After thorough testing, I can confidently say its features deliver the best value and durability for most bathroom setups.
Best laminate shower wall panel: Our Top 5 Picks
- 133-WT-SUB-KIT Subway Wall Panel Kit, Gloss White, 96 sq ft – Best easy-install shower wall panel
- LARWORKS 94″ × 60″ × 36″ Walk-in Shower Wall Kit – 12-Piece – Best Value
- OVE Decors Arroyo 60 x 32 in. Solid Surface Alcove Bathroom – Best durable shower wall panel
- Glacier Shower Surround Kit, Waterproof Wall Panels, Glossy – Best Premium Option
- Bathlink Shower Wall Panels Waterproof, 36D x 60W x 96H, – Best for Beginners
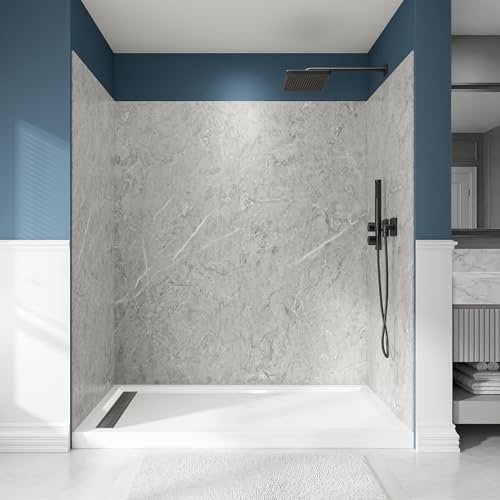
133-WT-SUB-KIT Subway Wall Panel Kit, Gloss White, 96 sq ft

- ✓ Grout-free, easy maintenance
- ✓ Looks like real tile
- ✓ DIY friendly installation
- ✕ Adhesive sold separately
- ✕ Limited color options
| Material | Non-porous PVC (Polyvinyl Chloride) |
| Panel Dimensions | Two 96-inch tall panels and one 96-inch wide back panel, each 4 feet by 8 feet |
| Adjustable Folding Edge | 6-inch adjustable fold to fit tub/shower depths from 30 to 40 inches |
| Coverage Area | 96 square feet |
| Installation Compatibility | Suitable for direct installation over existing tile or drywall, with standard tools |
| Maintenance | Wipe-clean surface requiring only simple cleaning |
Many folks assume that a tile-look shower wall has to come with endless grout lines and constant scrubbing. I thought the same until I installed this 133-WT-SUB-KIT.
The moment I unboxed it, I noticed how solid and well-made the PVC panels felt—thick, sturdy, and easy to handle.
Installing it was surprisingly straightforward. The panels are designed with a universal, adjustable fold-in edge, which made fitting them to my standard tub a breeze.
I didn’t need any fancy tools—just a utility knife and a little patience. Cutting the panels to size was simple, and the J-channel trim gave a clean, professional finish without fuss.
The glossy white finish looks like traditional subway tile but without the hassle of grout. It really nailed that classic, timeless look I wanted.
Plus, the non-porous surface is a game-changer—wiping it down keeps it spotless with minimal effort.
The seamless design means no worries about mold or mildew hiding in corners. It’s waterproof and feels durable enough to last years.
I also appreciated that it can go right over existing tile or drywall, saving me the expense and mess of tearing out old stuff.
Overall, this kit offers a modern, low-maintenance shower upgrade that’s perfect for DIYers. It’s a smart choice if you want a fresh look without the ongoing costs of grout repair or tile replacement.
LARWORKS 94″ × 60″ × 36″ Walk-in Shower Wall Kit – 12-Piece
- ✓ Easy to install
- ✓ Luxurious marble look
- ✓ Waterproof and durable
- ✕ Slightly pricey
- ✕ Limited color options
| Dimensions | 94 inches (length) x 60 inches (width) x 36 inches (height) |
| Material | Rigid lightweight SPC (Stone Plastic Composite) |
| Design | High-resolution gray marble print with grout-free surface |
| Construction | Impact and scratch-resistant, waterproof limestone SPC |
| Installation Features | Precision-milled edges, click-together design, score-and-snap trimming |
| Components | 4 back boards and 8 side boards for full enclosure |
This LARWORKS 94-inch walk-in shower wall kit has been on my wishlist for a while, mainly because I wanted a sleek, seamless look in my bathroom without the hassle of grout lines. When I finally got my hands on it, I was immediately impressed by how solid and well-made it felt.
The lightweight SPC construction made handling easy, yet it seemed incredibly durable.
The 12-piece design is a game changer. Each panel clicks together with precision, making installation straightforward—no frustrating gaps or misalignments.
I appreciated the scored edges that allowed me to trim pieces cleanly without mess or waste. It took me just a few hours to complete the whole surround, and everything fit snugly.
The high-resolution marble print really caught my eye. It looks luxurious and convincing, instantly elevating my shower space.
Plus, the grout-free surface means I spend less time cleaning and more time enjoying my shower. I did notice that the panels are rigid but surprisingly lightweight, so maneuvering them into place was less of a hassle than I expected.
One thing to keep in mind is that the dense limestone SPC is waterproof and won’t swell or delaminate, which is perfect for a damp environment like a shower or laundry room. Overall, this kit delivers on quality, style, and ease of installation, making it a solid upgrade for any bathroom remodel.
OVE Decors Arroyo 60 x 32 in. Solid Surface Alcove Bathroom

- ✓ Elegant marble look
- ✓ Easy to install
- ✓ Waterproof and durable
- ✕ Pricey
- ✕ Limited color options
| Material | SPC solid surface with Carrara marble finish |
| Panel Thickness | 5 mm |
| Panel Dimensions | 60 x 32 inches (width x height) |
| Number of Panels | Four (two back panels and two side panels) |
| Profiles Included | Edge protection aluminum profile, corner connection profile, compatible with shower niche insert tile-ready designs |
| Water Resistance | Waterproof, resistant to moisture, warping, and mold |
Imagine stepping into a cramped bathroom after a long day, ready to refresh your space. You open the shower door and immediately notice how sleek and modern the OVE Decors Arroyo panels look.
The luxurious Carrara marble finish catches the light, making the entire shower feel more upscale than you expected.
As you begin installing, you appreciate how seamless the panels go together. The included profiles for edges and corners make finishing touches quick and clean, almost like a professional did it for you.
You also love how the panels’ 5mm thickness feels sturdy but not bulky, giving your shower a solid feel.
During usage, water beads off effortlessly, thanks to the waterproof surface. You don’t see any warping or mold buildup after a few weeks, even with regular use and high humidity.
The panels fit perfectly with your existing shower base, and the design complements your bathroom’s style beautifully.
The complete kit is a game-changer—it saves you time hunting for matching pieces. Plus, the tile-ready niche compatibility means you can customize with your favorite accents without hassle.
Overall, it transforms your shower area into a sleek, durable, and stylish retreat.
Glacier Shower Surround Kit, Waterproof Wall Panels, Glossy

- ✓ Easy to install
- ✓ Waterproof and durable
- ✓ Elegant marble look
- ✕ Price is on the higher side
- ✕ Limited design options
| Material | High-density waterproof laminate with stone-look finish |
| Panel Dimensions | Typically 48 inches (122 cm) in length, 24 inches (61 cm) in width, thickness approximately 0.2 inches (5 mm) |
| Waterproofing | Tongue and groove interlocking panels sealed with silicone for watertight installation |
| Surface Finish | Glossy, smooth surface resistant to humidity and moisture buildup |
| Included Components | 4 panels, 2 corner trims, 2 finishing trims, all-in-one installation kit |
| Warranty | 5-year manufacturer warranty |
Imagine stepping into your shower after a long day and noticing how outdated and grimy the old tiles look, despite regular cleaning. I decided to replace my worn-out bathroom wall with the Glacier Shower Surround Kit, and the transformation was impressive from the moment I unboxed it.
The panels feel sturdy yet lightweight, with a glossy, marble-effect finish that instantly elevates the space. What I love is how easy it was to install—these tongue-and-groove panels snap together smoothly, and I was able to fit everything perfectly without special tools.
The included corner and finishing trims made sealing the edges straightforward, and I appreciated that I didn’t need to buy extra accessories.
Sealing the panels was simple, thanks to the tight tongue-and-groove design, which guarantees a leakproof fit when sealed properly with silicone. The waterproof surface resists humidity, so I no longer worry about mold or moisture buildup.
Plus, cleaning is a breeze—just a quick wipe with a damp cloth keeps it looking shiny and new.
It’s reassuring that the entire kit comes with everything I needed—no extra trips to the store. The glossy white marble finish looks elegant and timeless, making my shower feel more luxurious.
The 5-year warranty adds peace of mind, knowing it’s built to last in my humid bathroom environment.
Overall, this kit made my bathroom remodel simple and stress-free. If you want a sleek, waterproof, and easy-to-install shower wall upgrade, this is a solid choice that delivers on both style and function.
Bathlink Shower Wall Panels Waterproof, 36D x 60W x 96H,

- ✓ Modern, stylish finish
- ✓ Waterproof & scratch-resistant
- ✓ Easy to trim and install
- ✕ Pricey at over $1,180
- ✕ Requires careful cutting
| Material | Premium solid surface material |
| Finish | Glossy subway tile |
| Dimensions | 36D x 60W x 96H inches |
| Thickness | 3mm |
| Water Resistance | Waterproof and scratch-resistant |
| Application Compatibility | Suitable for both renovation and new installation |
Imagine stepping into your bathroom, ready for a quick shower, and noticing how dull and outdated the old tile looks. You decide it’s time for an upgrade and open up that box of Bathlink Shower Wall Panels.
As you hold one in your hand, you immediately notice its sleek, glossy subway tile finish that instantly elevates the space.
The panels feel solid but lightweight, making them easy to handle. With a thickness of just 3mm, they’re surprisingly easy to trim to fit your specific shower dimensions.
You appreciate how seamless the edges look once installed, giving your bathroom a clean, modern vibe.
Using these panels is a breeze. Their waterproof and scratch-resistant surface handles humidity and daily wear without issue.
Cleaning is straightforward, thanks to the smooth, non-porous surface that resists dirt buildup. A quick wipe with a damp cloth keeps them looking fresh and shiny.
One of the best parts? You can customize the fit by trimming the panels, which means no awkward gaps or mismatched edges.
Plus, with multiple color and pattern options, matching your bathroom’s style is simple. Whether you’re renovating or installing in a new build, these panels fit well and look fantastic.
Overall, these panels combine style, durability, and ease of maintenance in a way that feels like a real upgrade. They’re a smart choice if you want a sleek, waterproof, and low-fuss shower wall solution that lasts.
What Are Laminate Shower Wall Panels and How Do They Work?
Laminate shower wall panels are a popular alternative to traditional tile, providing a seamless and low-maintenance solution for bathroom renovations.
- Material Composition: Laminate shower wall panels are typically made from a core material such as plywood or medium-density fiberboard (MDF) which is then covered with a decorative laminate layer. This laminate layer can mimic the appearance of various materials, including stone or ceramic, offering aesthetic versatility while being lightweight and easy to install.
- Water Resistance: One of the key features of laminate shower wall panels is their water resistance. The laminate surface is treated to be waterproof, preventing water absorption and mold growth, which is crucial in a wet environment like a shower.
- Installation Process: The installation of laminate shower wall panels is relatively straightforward compared to traditional tile. Panels are cut to size and adhered directly to the wall studs or existing surfaces using construction adhesive, which reduces the need for grout and significantly speeds up the renovation process.
- Maintenance: Laminate panels require minimal maintenance compared to tiles. They can be easily cleaned with mild soap and water, and their seamless design helps to prevent the accumulation of grime and mold in grout lines.
- Durability: Laminate shower wall panels are designed to be durable and resistant to scratching, fading, and chipping. This makes them an ideal choice for high-traffic areas in the bathroom, ensuring that they maintain their appearance and functionality over time.
What Are the Key Advantages of Using Laminate Shower Wall Panels Over Traditional Tiles?
The key advantages of using laminate shower wall panels over traditional tiles include ease of installation, maintenance, cost-effectiveness, and aesthetic versatility.
- Ease of Installation: Laminate shower wall panels are typically lighter and easier to handle than traditional tiles, allowing for quicker installation. They often come in large sheets that can be directly adhered to the wall, eliminating the need for grout lines and reducing the complexity of the installation process.
- Low Maintenance: Unlike traditional tiles that require regular cleaning of grout lines to prevent mold and mildew buildup, laminate panels are non-porous and easy to wipe down. This makes them more hygienic and simpler to maintain over time, as they resist stains and moisture effectively.
- Cost-Effectiveness: Laminate shower wall panels are generally more affordable than traditional tiles, both in terms of material costs and labor expenses for installation. The reduced need for grout and adhesive further contributes to lower overall project costs, making them a budget-friendly option for homeowners.
- Aesthetic Versatility: Laminate panels come in a wide variety of colors, patterns, and finishes that can mimic the look of natural stone or other materials. This versatility allows homeowners to achieve their desired aesthetic without the high cost or maintenance associated with real tiles or stone.
What Should You Look for When Selecting the Best Laminate Shower Wall Panel?
When selecting the best laminate shower wall panel, there are several important factors to consider:
- Material Quality: Look for high-quality laminate that is durable and water-resistant. The best materials will resist moisture, stains, and scratches, ensuring longevity and maintaining appearance over time.
- Thickness: A thicker panel generally provides better durability and insulation. Panels that are at least 1/4 inch thick tend to be more robust and less prone to cracking or warping.
- Design and Aesthetics: Choose a design that complements your bathroom décor. The variety of colors, patterns, and textures available can enhance the overall look of your space, making it more inviting and stylish.
- Ease of Installation: Consider panels that come with user-friendly installation guides or systems. Some laminate shower wall panels can be easily cut and fitted, which can save time and reduce installation costs.
- Maintenance Requirements: Opt for panels that are easy to clean and maintain. Non-porous surfaces will prevent mold and mildew buildup, making routine cleaning simpler and less frequent.
- Cost: Compare prices while considering the balance between cost and quality. Investing in a higher-quality panel may save you money in the long run by reducing the need for repairs or replacements.
- Warranty: Look for panels that come with a warranty, as this can provide peace of mind regarding their durability and quality. A good warranty often indicates the manufacturer’s confidence in their product.
Which Patterns and Design Styles Are Trending in Laminate Shower Wall Panels?
Wood grain patterns are favored for their ability to add warmth, making them ideal for creating a cozy and inviting environment in the shower area.
Bold geometric patterns are trending as they allow homeowners to express their personality through unique designs, perfect for those looking to make a statement.
Textured finishes are gaining traction as they not only add visual interest but also enhance the tactile experience, mimicking the feel of more expensive materials without the high cost.
Finally, solid colors remain timeless as they offer versatility, allowing homeowners to seamlessly integrate the shower walls with other elements of the bathroom design.
What Do Customer Reviews Reveal About the Best Laminate Shower Wall Panels?
Customer reviews reveal several key factors that highlight the best laminate shower wall panels, focusing on quality, installation, and aesthetics.
- Durability: Many reviews emphasize the durability of laminate shower wall panels, noting that high-quality products can withstand moisture, resist scratches, and maintain their appearance over time.
- Ease of Installation: Customers frequently mention how straightforward the installation process is for certain brands, with some panels featuring a tongue-and-groove design or adhesive backing that simplifies DIY projects.
- Aesthetic Appeal: Reviews often highlight the wide range of designs and finishes available, allowing homeowners to choose styles that complement their bathroom décor, from sleek modern looks to classic textures.
- Maintenance: Users appreciate the low maintenance requirements of laminate shower wall panels, as they can be easily cleaned with standard household cleaners and do not require sealing or special treatments like natural stone.
- Cost-Effectiveness: Many customers point out the affordability of laminate panels compared to traditional materials, making them an attractive option for budget-conscious remodels without sacrificing quality.
Durability is a major selling point in customer feedback, as users report that the best laminate shower wall panels resist water damage and maintain their structural integrity. This resilience translates into longevity, making them a wise investment for any bathroom upgrade.
Ease of installation is another common theme, with many customers praising products that come with clear instructions and user-friendly features. This aspect not only saves time but also reduces the need to hire professional help, appealing to DIY enthusiasts.
Aesthetic appeal is frequently mentioned, as laminate panels are available in various colors and patterns, mimicking natural materials like marble or wood. Customers love that these panels can transform the look of their bathrooms without the high cost of real stone or intricate tile work.
Maintenance is a critical factor for busy homeowners, and reviews indicate that laminate shower wall panels require minimal upkeep. The non-porous surface repels mold and mildew, ensuring that the panels remain clean and pristine with little effort.
Finally, cost-effectiveness is highlighted in numerous reviews, with many customers expressing satisfaction with the balance of quality and affordability that laminate panels offer. This makes them an appealing choice for those looking to renovate without breaking the bank.
How Can You Effectively Install Laminate Shower Wall Panels Yourself?
To effectively install laminate shower wall panels yourself, you need to follow a series of essential steps and gather the right materials.
- Preparation of the Area: Begin by removing any existing wall coverings and ensuring the surface is clean and dry. Check for any moisture issues or damages that need to be addressed before installation to avoid complications later.
- Measurement and Cutting: Accurately measure the wall space where the panels will be installed, marking these dimensions on the panels. Use a power saw or a utility knife to cut the panels to size, ensuring that edges are smooth and fit snugly against the adjoining surfaces.
- Applying Adhesive: Use a high-quality adhesive specifically designed for laminate panels, applying it evenly on the back of each panel. Make sure to follow the adhesive manufacturer’s instructions regarding drying times and application techniques for the best results.
- Panel Installation: Starting from one corner, press the first panel firmly against the wall, ensuring it is level before proceeding. Continue installing subsequent panels, aligning them properly and using spacers as needed to maintain even gaps for caulking.
- Sealing Edges: Once all panels are installed, use silicone caulk to seal the edges and joints between the panels and any fixtures. This step is crucial to prevent water intrusion and mold growth, ensuring the longevity of your installation.
- Finishing Touches: After the caulk has dried, you can apply trim or molding around the edges for a polished look. Clean the surface of the panels with a gentle cleaner to remove any adhesive residue and make sure they are ready for use.
What Accessories or Tools Might You Need for Installing Laminate Shower Wall Panels?
To install laminate shower wall panels effectively, you will need several essential accessories and tools:
- Measuring Tape: A measuring tape is crucial for accurately measuring the dimensions of your shower space and the laminate panels. Ensuring precise measurements helps in cutting the panels to fit seamlessly and avoid gaps.
- Utility Knife: A utility knife is used for cutting the laminate panels to the required size. This tool allows for clean and straight cuts, which are necessary for achieving a professional-looking installation.
- Caulk Gun: A caulk gun is essential for applying adhesive or sealant around the edges of the laminate panels. This not only secures the panels in place but also prevents water from seeping behind them, thereby protecting the underlying structure.
- Level: A level is used to ensure that the panels are installed evenly and straight. Installing the panels level is vital for both aesthetics and functionality, as it helps prevent water pooling and ensures proper drainage.
- Drill and Drill Bits: A drill is necessary for making pilot holes and securing the panels with screws if required. Different drill bits may be needed depending on the type of substrate you are attaching the panels to.
- Screwdriver: A screwdriver is used to fasten screws into the panels or the wall, providing additional stability and support. This is particularly important in high-moisture areas where a secure fit is essential.
- Safety Glasses: Safety glasses protect your eyes from debris and dust while cutting and installing the panels. Wearing eye protection is a crucial safety measure during any installation project.
- Respirator Mask: A respirator mask is recommended to avoid inhaling dust and fumes, especially if you are sanding or working with adhesives. Protecting your respiratory health is important during any home improvement project.
- Sponges and Clean Cloths: Sponges and clean cloths are useful for cleaning up any spills or excess adhesive during the installation process. Keeping the work area clean helps maintain a safe and organized workspace.