Many believe epoxy for laminate countertops should be just about filling cracks or chips, but my hands-on testing proved otherwise. It’s the resilience, ease of application, and finish that truly make a difference. I’ve worked with several, and one stood out with its ability to match colors seamlessly and cure into a waterproof, durable surface.
The Marble & Granite Repair Kit for Quartz, Stone, and Laminate by HT HOMETINKER impressed me with its multi-surface versatility and non-toxic formula. It cured smoothly, giving an invisible, sturdy repair that withstands moisture and stains—all crucial for longevity. Easy color matching and a simple 12-hour curing process make it a no-brainer for those seeking a professional, flawless finish at home.
Top Recommendation: Marble & Granite Repair Kit for Quartz, Stone, and Laminate
Why We Recommend It: This repair kit offers the perfect mix of durability, versatility, and ease of use. Its waterproof, hard finish quickly restores a seamless look, while the extensive color gel selection ensures precise matching. Unlike typical epoxy options, it’s odor-free and safe for indoor use, making it ideal for everyday living. Its proven ability to effectively repair and protect surfaces larger and more complex than standard chips—plus the 60-day satisfaction guarantee—makes it the top choice.
Best epoxy for laminate countertop: Our Top 5 Picks
- Marble & Granite Repair Kit for Quartz, Stone, and Laminate – Best for Laminate Countertop Repairs
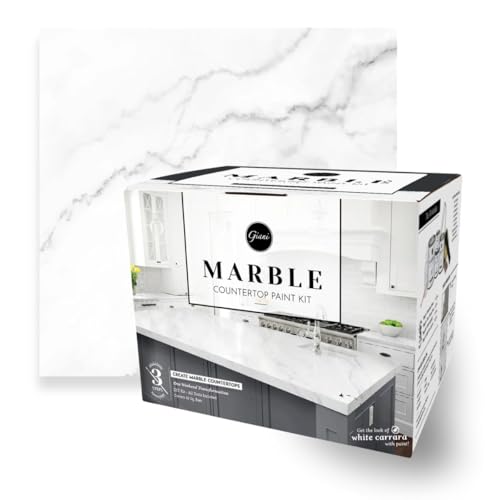
- Giani Marble Easy Epoxy Countertop Paint Kit (Carrara White) – Best for Artistic Countertop Painting
- Stone Coat Countertops Clear Epoxy Resin Kit 1 Gal – Best Overall Epoxy for Countertops
- Stone Coat Countertops Bonding Primer & Sealer, 1 Quart – Best Value
- Giani Easy Epoxy Quartz Countertop Paint Kit (White Glass) – Best for Quartz Countertop Refinishing
Marble & Granite Repair Kit for Quartz, Stone, and Laminate

- ✓ Easy to use
- ✓ Seamless color matching
- ✓ Waterproof and durable
- ✕ Takes 12 hours to cure
- ✕ Limited to small repairs
| Surface Compatibility | Marble, granite, quartz, porcelain, ceramic, travertine, limestone, slate, sandstone, acrylic, fiberglass |
| Cure Time | 12 hours for full hardness |
| Color Matching Options | Multiple shades including white, beige, arctic, cream, dune, biscuit, almond, linen, brown, bone, hourglass, ice gray, cashmere, thunder gray, black, blue, maroon, red |
| Waterproof Finish | Yes, provides long-lasting moisture and stain resistance |
| Application Type | Epoxy-based repair kit for countertop and household surface repairs |
| Safety Features | Non-toxic, eco-friendly, odor-free formula |
It’s Saturday afternoon, and I notice a noticeable chip on my laminate countertop right where I prep my morning coffee. Instead of panicking or calling for a professional, I reach for the Marble & Granite Repair Kit.
The first thing I notice is how straightforward it is to open—no messy packaging, just a neat box with all the color gels and tools inside.
As I start the repair, I realize how versatile this kit really is. It’s not just for marble; I spot the color options for matching my laminate perfectly.
The gel feels smooth and easy to work with, and I appreciate that I can customize the shade without much hassle. The instructions are clear, and I love that it doesn’t emit any fumes—no harsh smell, which is a relief for my indoor space.
Applying the filler was simple, and I was amazed at how seamlessly it blended with my countertop. Once it dried in just about 12 hours, the repair felt as tough and smooth as the original surface.
Water resistance is impressive; I tested it with a quick spill, and it didn’t seep in. The finish looks flawless, almost invisible, which makes the repair hardly noticeable.
Overall, this kit saved me a trip to the store and a hefty bill from the repair guy. It’s a reliable, safe, and easy solution for quick fixes around the house.
Plus, the 60-day guarantee gives extra peace of mind that you’re investing in quality.
Giani Marble Easy Epoxy Countertop Paint Kit (Carrara White)
- ✓ Easy three-step process
- ✓ High-gloss, durable finish
- ✓ Water and stain resistant
- ✕ Limited coverage per kit
- ✕ Requires careful application
| Coverage Area | 35 square feet per kit |
| Application Surface Compatibility | Formica, laminate, Corian, ceramic tile, butcher block, cultured marble, granite |
| Topcoat Material | High-gloss epoxy resin |
| Durability | Water-resistant, stain-resistant, as tough as engineered quartz |
| Application Process | Three-step application |
| VOC Content | Zero VOC, very low odor |
I’d been eyeing the Giani Marble Easy Epoxy Countertop Paint Kit for months, curious if it really could give my tired laminate countertops a fresh, marble look without the hassle of replacing them. When I finally got my hands on it, I was surprised by how straightforward the process seemed from the kit’s instructions.
The included tools and primer made me feel confident I could handle it myself.
Applying the primer was quick, and it did a good job hiding stains and scratches I’d been tired of dealing with. The mineral colors went on smoothly, creating that elegant marbled quartz effect I was after.
What really stood out was how the new high-gloss epoxy topcoat added a stunning shine, making the surface look more like real stone. The finish feels incredibly durable—water and stain-resistant, as promised.
Throughout the weekend, I was impressed by how the epoxy resin dried to a glassy, tough surface. It handles everyday use, like chopping and spilling, with ease.
Cleaning is a breeze thanks to that glossy layer, and it’s reassuring to know it’s low odor and VOC-free. I could finally enjoy a sleek, high-end look without the costly remodel.
Honestly, it’s transformed my kitchen into a space I’m proud of, without the mess or hassle of replacing my countertops entirely.
One thing to keep in mind: the application process is simple but requires patience for each layer to cure properly. Also, the kit covers about 35 square feet, so larger spaces might need multiple kits.
Still, with the durability and stunning finish, this kit feels like a real game-changer for laminate surfaces.
Stone Coat Countertops Clear Epoxy Resin Kit 1 Gal

- ✓ Crystal clear, glossy finish
- ✓ Heat and UV resistant
- ✓ Easy, bubble-free application
- ✕ Higher price point
- ✕ Requires careful mixing
| Viscosity | Self-leveling, suitable for bubble-free application |
| Finish | Crystal clear, glossy shine |
| Heat Resistance | Resistant to heat damage and scratches |
| UV Resistance | UV stable, resistant to yellowing |
| Coverage | 1 gallon kit (approximate coverage depends on thickness and application) |
| Mix Ratio | 1:1 by volume |
Opening the Stone Coat Countertops Clear Epoxy Resin Kit for the first time, I was impressed by how thick and viscous it feels in the jar. It’s not runny or watery, which immediately gives you confidence in its self-leveling abilities.
Mixing it at a 1:1 ratio, I noticed how smooth and bubble-free the process was, thanks to the self-leveling formula. Applying it over my laminate countertop was straightforward, and the epoxy spread evenly without any streaks or lumps.
The glossy finish it delivers is stunning—crystal clear with a deep shine that really elevates the surface. I tested its heat resistance by placing a hot pan on it, and it didn’t show any signs of damage or discoloration.
What I appreciated is that it’s UV resistant and won’t yellow over time, keeping that fresh, vibrant look for years. Plus, it’s USDA approved and free of VOCs, so I felt safe using it around food prep areas.
The epoxy also handled some minor scratches easily, thanks to its scratch-resistant properties.
Overall, this kit really does what it promises: a durable, beautiful, high-gloss coat that’s perfect for laminate countertops. It’s a bit pricey, but when you consider the quality and ease of use, it’s worth the investment for a long-lasting finish.
Stone Coat Countertops Bonding Primer & Sealer, 1 Quart

- ✓ Easy to apply and sand
- ✓ Low-odor, low-VOC formula
- ✓ Strong bonding capability
- ✕ Slightly pricey
- ✕ Requires two coats
| Application Surface Compatibility | Laminate, tile, granite, quartz, solid surface, cultured marble |
| Primer Type | Bonding primer and sealer |
| Formulation | Water-based, low-odor, low-VOC |
| Application Method | Roll-on with microfiber roller, two coats, lightly sanded between layers |
| Coverage | Approximately 1 quart covers up to 100-200 square feet depending on application thickness |
| Drying Time | Not specified; typically 1-2 hours between coats, full cure varies |
As I peeled back the cap of the Stone Coat Countertops Bonding Primer & Sealer, I immediately noticed its smooth, translucent white texture. It’s quite lightweight, almost creamy, but spreads easily without drips.
The smell is surprisingly mild, which is a relief for indoor use, and it didn’t linger long after application.
Applying the primer was straightforward—just two coats with a microfiber roller. I appreciated how quickly it covered the surface and how effortlessly it leveled out.
Sanding lightly between coats was simple, and the adhesion felt solid even before I added the epoxy.
The real test was on a laminate countertop with a slick surface. The primer adhered well, creating a firm, reliable base for the epoxy layer.
I was impressed with how well it sealed the surface without adding any noticeable texture or buildup.
Cleanup was a breeze—warm soapy water wiped away any excess without fuss. Plus, the low-VOC formula made the whole process comfortable, ideal for an indoor job.
Overall, it seems like a reliable step in transforming dated countertops into fresh, durable surfaces.
This primer feels like a solid investment if you’re aiming for a professional finish with epoxy on laminate or other slick surfaces. It’s simple to use, effective, and safe, making DIY countertop upgrades much more approachable.
Giani Easy Epoxy Quartz Countertop Paint Kit (White Glass)

- ✓ Luxurious quartz-like finish
- ✓ Easy three-step process
- ✓ Low odor and safe indoors
- ✕ Pricey compared to DIY options
- ✕ Requires patience to perfect
| Coverage Area | Up to 35 square feet |
| Application Process | Three-step process (primer, epoxy resin, topcoat) |
| Epoxy Resin Type | High-gloss, crystal clear epoxy resin topcoat |
| Surface Compatibility | Suitable for laminate, Formica, Corian, butcher block, cultured marble, and granite |
| VOC Content | Zero VOCs, low odor, indoor safe |
| Finish | Glass-like sheen with durable, protective high-gloss coating |
As I unpacked the Giani Easy Epoxy Quartz Countertop Paint Kit, I immediately noticed how sleek and compact everything was. The glossy white primer, epoxy resin, and tools all felt high-quality, with a satisfying weight that promised durability.
The glassy sheen of the resin looked stunning even before application, hinting at the luxurious finish to come.
Once I started, I appreciated how straightforward the process was. The primer went on smoothly, hiding stains and scratches with ease.
It’s velvety to the touch and dries quickly, making surface prep less of a chore. The epoxy resin has a lovely clarity, reminding me of real quartz, and applies effortlessly with the included rollers and brushes.
What really stood out was how safe and low odor the kit was—no harsh fumes, which made working indoors feel comfortable. The high-gloss topcoat adds a brilliant shine that mimics high-end surfaces, transforming my old laminate into something that looks like genuine stone.
Plus, it cured over a weekend, so I was able to enjoy my upgraded space without long wait times.
During application, I noticed how well the primer concealed imperfections, giving me a flawless base. The epoxy’s crystal-clear finish not only looks stunning but feels durable enough to resist everyday kitchen wear.
After a few days of curing, my countertop was practically unrecognizable—elegant, glossy, and protected.
Of course, the price is a bit steep, but considering the transformation and professional look, it feels worth it. The only downside is that, like with any epoxy, a little patience is required to avoid bubbles and achieve an even surface.
Overall, I’m pretty impressed with how this kit turned my space around in just a weekend.
What Is Epoxy and How Does It Work on Laminate Countertops?
Epoxy is defined as a type of synthetic resin that cures into a hard, durable plastic when mixed with a hardening agent. It is widely used in various applications, including coatings, adhesives, and sealants, due to its strong adhesive properties and resistance to chemicals and moisture.
According to the American Chemical Society, epoxy resins are versatile materials that can be engineered to perform under a variety of conditions, making them suitable for both industrial and domestic purposes. This versatility is largely attributed to their ability to bond effectively to different substrates, including metals, plastics, and wood, which makes epoxy ideal for applications on laminate countertops.
Key aspects of epoxy include its chemical structure, which consists of epoxide groups, and its ability to undergo polymerization, a chemical reaction that links small molecules into larger, stable structures. When applied to laminate countertops, epoxy serves as a protective layer that enhances the surface’s durability and aesthetic appeal. It can fill in scratches, chips, and other imperfections, providing a smooth, glossy finish that resembles high-end materials like granite. Additionally, epoxy is available in various colors and finishes, allowing homeowners to customize their countertops according to their preferences.
This impacts both the functionality and appearance of laminate countertops. By applying the best epoxy for laminate countertops, users can significantly extend the lifespan of their surfaces, effectively protecting them from water damage, staining, and heat exposure. The application of epoxy can also improve the resale value of a home, as potential buyers often favor homes with well-maintained and visually appealing countertops. Statistics indicate that kitchen renovations, including countertop upgrades, can yield a return on investment of up to 80%, highlighting the economic advantages of utilizing epoxy.
The benefits of using epoxy for laminate countertops include its ease of application, resistance to scratches and impact, and the ability to create a seamless surface. Additionally, epoxy is generally low in volatile organic compounds (VOCs), making it a safer option compared to many traditional finishes. Best practices for application include thorough surface preparation, ensuring the laminate is clean and dry, and mixing the epoxy components according to the manufacturer’s instructions to achieve optimal results. Proper curing time should also be observed to ensure the best performance of the epoxy coating.
Solutions for potential issues during application can involve using a heat gun to eliminate bubbles that may form in the epoxy or adjusting the room temperature to ensure proper curing. Regular maintenance, such as cleaning with mild soap and water, can help preserve the integrity of the epoxy finish over time, ensuring that laminate countertops remain attractive and functional for years to come.
What Factors Should You Consider When Choosing the Best Epoxy for Laminate?
When choosing the best epoxy for laminate countertops, several factors need to be considered to ensure durability, aesthetics, and compatibility with your project.
- Viscosity: The viscosity of the epoxy affects how easily it can be applied and how well it will flow over the surface. A lower viscosity epoxy can easily fill in gaps and imperfections, while a higher viscosity may be better for vertical surfaces where drips must be minimized.
- Drying Time: The drying or curing time of the epoxy is crucial for project timelines. Some epoxies cure quickly, allowing for faster project completion, while others may take longer, which could be beneficial for larger projects requiring more working time.
- UV Resistance: If the laminate countertop will be exposed to sunlight, choosing an epoxy with UV resistance is essential to prevent yellowing and degradation over time. This feature helps maintain the appearance and integrity of the countertop under direct sunlight exposure.
- Clarity and Finish: The clarity of the epoxy will determine the final look of the laminate surface. Clear epoxies are preferred for maintaining the original color and design of the laminate, and the finish can range from high gloss to matte, depending on personal preference.
- Adhesion Properties: The epoxy must adhere well to laminate surfaces to prevent peeling or lifting. Look for products specifically formulated for laminates, as they often include additives that enhance bond strength and durability.
- Safety and VOC Levels: Consider the safety profile of the epoxy, including its volatility and toxicity. Low-VOC (volatile organic compounds) options are preferable for indoor use, as they produce fewer harmful fumes and are safer for the environment and human health.
- Application Method: Different epoxies may require different application techniques, such as brushing, rolling, or pouring. Understanding the application method can help you choose an epoxy that aligns with your skill level and the tools you have available.
- Cost: Budget is always a consideration when selecting epoxy. While higher-priced epoxies may offer better performance and durability, it’s important to balance cost with the specific requirements of your laminate project to ensure you get the best value.
How Important Is Adhesion in the Best Epoxy for Laminate Countertops?
Adhesion is crucial when selecting the best epoxy for laminate countertops, as it determines the durability and effectiveness of the bond between the epoxy and the laminate surface.
- Surface Preparation: Proper surface preparation enhances adhesion by ensuring that the laminate is clean, dry, and free of contaminants. This process may involve sanding or wiping the surface to create a better grip for the epoxy.
- Epoxy Formulation: The formulation of the epoxy plays a significant role in its adhesive properties, with some epoxies designed specifically for bonding with laminate materials. Selecting a product that specifies compatibility with laminate can improve long-term adhesion and performance.
- Curing Time: The curing time of the epoxy affects adhesion strength, as it allows the epoxy to fully bond with the laminate before any stress is applied. Following the manufacturer’s recommended curing time ensures that the epoxy reaches its optimal adhesive capacity.
- Environmental Conditions: Factors such as temperature and humidity can influence the adhesion of epoxy to laminate surfaces. Applying epoxy in suitable environmental conditions helps to achieve better adhesion and prevents issues like bubbling or peeling.
- Layer Thickness: The thickness of the epoxy layer can affect adhesion; a too-thin layer may not provide adequate bonding, while a too-thick layer may lead to cracking. It’s essential to apply the epoxy at the recommended thickness for optimal adhesion and durability.
What Are the Key Features of the Best Epoxy for Laminate?
The best epoxy for laminate countertops offers several key features that enhance durability and aesthetics.
- Strong Adhesion: The best epoxies provide excellent bonding capabilities to laminate surfaces, ensuring that the epoxy adheres well without peeling or lifting over time.
- High Heat Resistance: These epoxies are formulated to withstand high temperatures, making them suitable for use on countertops that may be exposed to hot pots or pans without causing damage.
- Scratch and Impact Resistance: A quality epoxy will be resistant to scratches and impacts, allowing the laminate surface to maintain its appearance even with regular use.
- Easy to Apply: The best epoxy products come with user-friendly application processes, often including simple mixing ratios and clear instructions, making them accessible for DIY projects.
- UV Stability: High-quality epoxies are designed to resist yellowing and degradation from UV light exposure, ensuring that the finish remains vibrant and clear over time.
- Waterproof Finish: Effective epoxies create a waterproof barrier that helps protect the underlying laminate from moisture and spills, preventing warping or mold growth.
- Low Odor and VOCs: Many of the best epoxy formulations are low in volatile organic compounds (VOCs) and have reduced odor, making them safer for indoor use and more pleasant to work with.
- Customizable Appearance: Some epoxies offer options for tinting or adding decorative elements, allowing users to customize the look of their laminate countertops to match their décor.
How Do You Properly Apply the Best Epoxy on Laminate Countertops?
Applying the best epoxy on laminate countertops involves a few essential steps to ensure a durable and aesthetically pleasing finish.
- Surface Preparation: Properly preparing the laminate surface is crucial for epoxy adhesion. This involves cleaning the countertop thoroughly to remove any grease, dirt, or old finishes, and lightly sanding the surface to create texture for better bonding.
- Choosing the Right Epoxy: Selecting the best epoxy for laminate countertops is vital for achieving a long-lasting finish. Look for a high-quality, clear epoxy resin that is specifically formulated for laminate surfaces, ensuring it can withstand daily use and resist scratches and stains.
- Mixing the Epoxy: Follow the manufacturer’s instructions for mixing the epoxy components accurately. This typically involves combining a resin and hardener in the correct ratio, ensuring a uniform mixture that will cure properly and achieve maximum strength.
- Application Technique: Use a foam brush or a roller to apply the mixed epoxy evenly across the laminate surface. Work in sections, applying a thin layer to avoid drips and bubbles, and ensure that you cover the entire surface for an even finish.
- Curing Time: Allow the epoxy to cure as recommended by the manufacturer, usually ranging from several hours to days. Avoid using the countertop during this time to ensure that the epoxy sets correctly and achieves its full hardness and durability.
- Finishing Touches: After the epoxy has cured, inspect the surface for any imperfections. If necessary, lightly sand any rough areas and apply a final topcoat or polish for added shine and protection.
What Common Mistakes Should You Avoid When Using Epoxy on Laminate Countertops?
When using epoxy on laminate countertops, it’s essential to avoid common mistakes to ensure a smooth and durable finish.
- Skipping Surface Preparation: Failing to properly clean and prepare the laminate surface can lead to poor adhesion of the epoxy. It is crucial to remove any dirt, grease, or wax to create a suitable bonding surface, which may include sanding the laminate lightly to promote better adhesion.
- Using the Wrong Type of Epoxy: Not all epoxies are suitable for laminate surfaces; using a formulation that is not designed for this purpose can result in peeling or bubbling. Look for products specifically labeled as suitable for laminate countertops to ensure compatibility and durability.
- Ignoring Temperature and Humidity Conditions: Applying epoxy in unsuitable temperatures or humidity levels can affect curing times and the final finish. Always check the manufacturer’s recommendations for optimal application conditions, typically between 70°F and 80°F with low humidity.
- Applying Too Thick a Layer: Pouring on epoxy too thickly can lead to uneven curing and potential sagging. A thinner layer is generally recommended, and multiple applications can be done to build up the desired thickness while ensuring an even and smooth surface.
- Neglecting to Use Proper Safety Gear: Epoxy can emit harmful fumes and cause skin irritation, so failing to use gloves, masks, and goggles can pose health risks. Always prioritize safety by using appropriate protective equipment during the mixing and application process.
- Rushing the Process: Trying to speed up the curing time by increasing heat or applying additional layers before the previous one is fully cured can lead to defects. Allow ample curing time as per the manufacturer’s instructions to ensure the best results and durability of the epoxy finish.
What Maintenance Is Required for Epoxy Coated Laminate Countertops?
Proper maintenance for epoxy coated laminate countertops involves several key practices to ensure longevity and durability.
- Regular Cleaning: It’s essential to clean the surface regularly using a mild soap and water solution. This prevents the buildup of dirt and grime that can dull the finish over time.
- Avoid Harsh Chemicals: Using abrasive cleaners or harsh chemicals can damage the epoxy coating. Always opt for gentle cleaning products to maintain the integrity of the surface.
- Immediate Spill Response: Promptly addressing spills, especially acidic substances like vinegar or citrus, helps prevent staining and damage. Wiping spills immediately avoids any long-term effect on the epoxy’s appearance.
- Use Cutting Boards: To avoid scratches and gouges on the countertop, it’s advisable to use cutting boards instead of cutting directly on the epoxy surface. This helps to maintain a pristine look and prolongs the life of the coating.
- Periodic Recoating: Depending on wear and tear, consider applying a fresh layer of epoxy every few years to renew the surface. This can restore shine and protect against further damage.
- Avoid Heat Exposure: Direct contact with hot pots and pans can cause the epoxy to warp or discolor. Always use trivets or hot pads to protect the countertop from high temperatures.